Sunday, 27 March 2016

Happy Easter!


Happy Easter! 

I absolutely love all holidays and as a fellow chocolate lover, Easter is definitely up there with my favourites. So, today I just wanted to write a quick post wishing you all a wonderful day and sharing a few pics from my Good Friday. We had my grandparents come over for a delicious roast dinner followed with a homemade lemon roulade. It was full of great food and lots of laughs. After dinner, we went on a little walk to see the lambs before heading home to enjoy the last few rays of the sun. All in all, a lovely day! 


I had such a lovely Good Friday and I hope you all have a wonderful Easter weekend. Eat lots of chocolate and laugh a lot and remember the true meaning of Easter.

Holly X
SHARE:

Thursday, 24 March 2016

Bunny Bunting.


My last post featured some homemade easter inspired bunting and it appeared to go down a treat. It was a really easy and inexpensive way to decorate for the easter holidays and so today I decided to share with you a slightly different type of easter bunting. In comparison to my last bunting, I made these with a kit I purchased from hobby craft. I love hobby craft and when I came across this adorable kit I just fell in love. Usually, when I see something like this, I will just try and adapt it and make it from scratch for less money. However, this kit was only £2 ! It would have cost more to make it from scratch so I decided to go ahead and buy it. 


Included in this kit was some sparkly string, 7 little pom poms (for the bunny tails), 8 sticky bow ties, a sheet of double sided stickers (to stick the tails on) and 15 pre-cut card bunnies in 5 different patterns. There were also instructions on the packaging.


First up, I lay the bunnies out in the order that I wanted them. I chose to keep them in a similar order to the order they came in. However, you could totally mix them up more and get creative with it. I then had to thread the string through the pre-punched holes in the bunny ears. This was the most time-consuming part of the whole process, especially when I came missing a hole meaning I had to undo it all again. If anybody choosing to give this kit a go, take your time with this bit. Make sure the string goes in and out the same way as the others and make sure not to miss any!


The next and final step was to add on the tail and tie. The bow-ties peeled off super easily and stuck on very well. I always worry when purchasing things like this that the sticky part doesn't actually stick very well. However, these stuck on great and looked so cute! The tails were a little more tricky. The double sided stickers were super sticky, which was great for ensuring the tails didn't fall off. However, this did make the handling a little more challenging. Thankfully I have some longish nails, making the peeling off the stickers easier. However, it was a little harder trying to position them in order to get the tail in the correct place. Despite it being a little more challenging, it wasn't too difficult and was still a lot of fun.


Voila! We have some super cute, very easy, wonderfully cheap and perfectly festive bunny bunting. I half expected them to turn out horribly with them being such a good price, but I was pleasantly surprised. 


I decided to hang mine in my kitchen, just in time for Good Friday! They completely transformed the room and everybody has been loving them. I always find that decorating for the holidays and seasons just transforms the house. It's always so much fun to do and I find it puts the whole family it more festive mood. 

Has anybody else been decorating their home for Easter?

There probably will not be another post until after easter, so I wish you all the happiest of Easters. I hope you eat too much chocolate and laugh until your belly hurts. Have a lovely time and enjoy it!

Holly X

SHARE:

Wednesday, 9 March 2016

Easter Inspired Bunting.


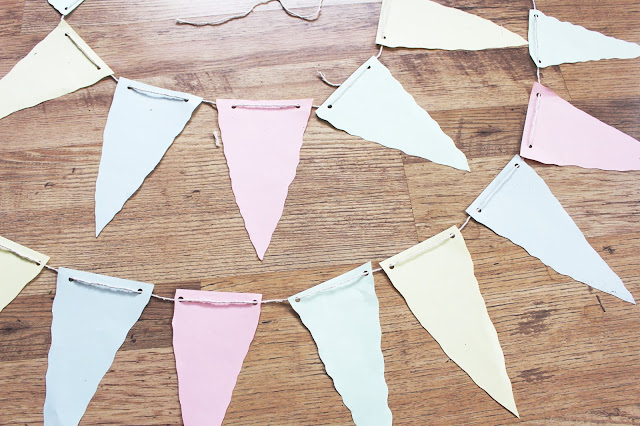
As you may know, I absolutely LOVE decorating for the seasons/holidays. It's such a fun way to get involved with the festivities and brighten up your home. Of course, you can easily just purchase some decor from a shop. However, this usually is pretty expensive. So, I like to try and create my own decor for a fraction of the price. Today I wanted to share how I made this ridiculously easy and super cheap easter inspired bunting. I actually already owned all of the necessary materials, but if you don't already own them, you can purchase them for a very reasonable price in a range of stores.


Equipment/ Materials Needed:
- Coloured Card (I chose four pastel colours for mine.) 
- A Hole Punch
- String 
- Scissors (Craft scissors work best but normal will work fine too.)


First of all, you need to take your craft scissors and cut out equal triangular shapes. In order to create equal shapes, I recommend measuring a rough outline before cutting. The craft scissors will create this wavy edge. However, my scissors broke meaning I had to use normal scissors and manually create this wavy edge. I think this worked just as well.


Next, you need to take your hole punch and punch two holes into the top of each triangle. Try to make the holes in roughly the same place each time.


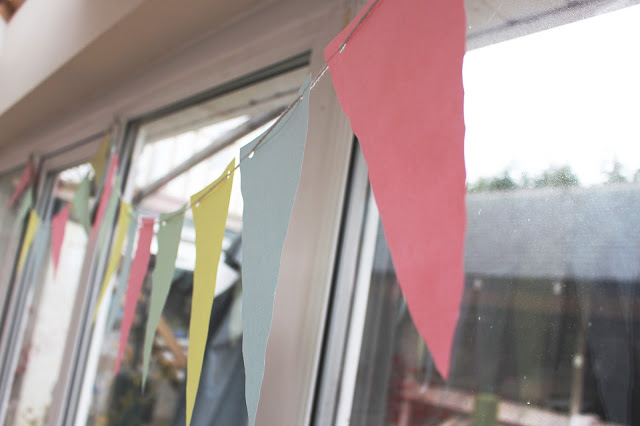
Finally, thread your string through your card and voila! You're done! This is literally one of the easiest crafts ever and it looks amazing. If you wanted to make this specifically for easter you could add some more details such as painting on little eggs or chicks. However, I wanted to be able to hang mine throughout spring and summer, so I left them as they were.


I was so so happy with how this worked out. The colours really brighten up my home just generally make the house look more springy. On top of looking super cute and being really easy, it really didn't take that long. The only part that was moderately time-consuming was cutting out the shapes. However, if you place more than one piece of the card together and cut multiple at once, this takes next to no time at all.

This is definitely one of those simple decor pieces that just make such a difference to your home. I definitely recommend giving this a go!

Does anybody else love decorating for the holidays/seasons?

Thanks for reading!

Holly X


SHARE:
Blogger templates by pipdig